Image Map

Facebook Pinterest Twitter Instagram Email Family Home Crafty Recipes Goals Blog Roll PR

Thursday, June 30, 2011

Eight is Great!

No folks, that is not a typo. Charlie is eight months old today! :-D The new stats are 15 lbs. 10 oz. and 26.5 inches! He's up 2 lbs 3 oz in a month. I can't believe it - normally it would take him several months to gain that much weight. Between all the solid food he's been eating and starting him on some formula though, it means we're heading in the right direction. Only four more months until he's one. Where is the time going?!


Some monthly updates on the short man...

Favorite toys: My Pal Scout, stacking cups

Favorite foods: Mango, banana, yogurt

Favorite activities: Being outside, going for a walk

Clothing size: Mostly 3-6 months, but a few 6-9 months things for their length

Teeth: Two bottoms totally grown in and three tops coming in now

Sleep: A good morning nap, a good afternoon nap, and then some spotty overnight sleep. Oh well.

Not quite sitting up alone or crawling yet, but he's well on his way!

Wednesday, June 29, 2011

Tutorial Tuesday: Custom Clock

Yes, yes, I realize that its Wednesday. Move along.

Today's tutorial is for a custom clock. If you don't know, I am pretty frugal; especially with things like decor that can be very expensive. Charlie's bedding is the rocket ship pattern from Dwell Studios at Target. There was a pretty extensive decor set to go with the bedding, but it just wasn't in my price range. I mean really, $20 for a night light and $60 for a canvas print? No thank you.

A few months ago, I did a tutorial for customized wall art using scrapbook paper and inexpensive frames from Michael's Crafts. Well, here is another piece for the set!

For this project you'll need:

Wall clock (I got this one for $4.97 at WalMart)
Screwdriver, needle nose pliers
Scrapbook paper that matches your theme
Patterns from the wall art
Glue, scissors, tape, marker

This project works best with a really cheap clock. I'm talking, cheap. You'll want to be able to unscrew the backing so you can take it apart, so leave the quality ticker for your living room. Which brings us to step one. Unscrew the back of the clock and pull it apart.

 
IMPORTANT! The hands of the clock are attached to a mechanism that makes them turn (duh) and there is a metal pin running through the middle of it. The red second hand is attached to this pin. Take extreme caution to not pull out the pin as you pull the red second hand off. If the pin pulls out, the gears inside will fall apart and your clock will not work.

Go ahead, ask me how I know this.

If as you pull the second hand off, the pin starts to come with it, have needle nose pliers handy to hold the metal pin still as you take the second hand off. It is possible! I promise!

Now that you have successfully taken your clock apart, its time to be artsy! With some clocks, the backing with the numbers on it will come off, but on others it will not. For this clock, the paper backing is glued into place, so I just have to work with it as is.

Trace the glass face onto the paper you want use to back the clock. By measuring the glass and measuring the clock face, you can cut off the difference and make a perfect fit. For instance, the clock face is 8 1/2 inches, but the glass is 9 inches. By taking off a 1/4" around the entire circle, it should fit into the clock face (left picture).

Try it out, making adjustments as you go. If its too big in one place, press the paper into the corner with your fingernail (right picture). When you pull the paper back out, you've marked what is too big and can easily cut off the excess.


Once you have it sized correctly, using a pencil, poke a hole in the middle so it fits over the clock mechanism. Now, if the paper backing pops out, just cover it with paper. You lucky dog, you.
 
This part is optional, but I'm a big spaz and need things like this. Before gluing the paper into place, use little sticky tabs or tape and mark off where the numbers are on the front. This will help you space them properly afterwards.

After marking your numbers, glue the backing to the clock. 

Next, cut out the pieces you'll be affixing to your clock. Here is where you can get creative! I decided to make little circles for the numbers, a simple background pattern, and a little rocket ship for the second hand. When you're happy with your pieces, its time to start gluing! I just use permanent glue stick - its cheap, easy to clean up, and works great.


Once my background was together, I worked on the second hand. At first, I put the rocket ship on the second hand so it would look like the rocket was orbiting the star in the background, but when I put it back together, it was to heavy and the second hand wouldn't turn. Instead, I taped the rocket ship to the middle of second hand and cut it down. The rocket ship would spin as the second hand ticked.

See how the pin is attached to the second hand? Yeah, NOT correct. When I pulled it apart to change the rocket's position is when the pin pulled out and I broke the clock. Sad face. After almost an hour of playing horologist, I gave up. There was no fixing the tiny gears that fell out of place.

Assuming you didn't screw it up like I did, once you have everything in place, its time to put the hands back on the clock. You know how when you change the time on a clock, the minute hand and hour hand move in tandem? Put the hands on the clock so they hit 12 o'clock exactly. Its a good starting place to make sure they'll move correctly when you set the time. If you notice in the finished picture at the top, the hands of my broken clock are at an impossible time. My second grade teacher taught me that if the minute hand is near the 12, the hour hand should be on either the 7 or the 8, not in between.

Aren't you glad I screwed up so I could give good directions? You're welcome.

After that, snap the second hand back into place and screw everything back together. Enjoy your new custom clock!

If you would like a custom clock, please contact me. I promise not to screw yours up.

Saturday, June 25, 2011

Spring Cleaning Saturday: Toys!

Or is it technically summer cleaning Saturday? Either way, its cleaning day! Today's task was cleaning all of Charlie's toys. Aside from spot cleaning and wiping, I try to give his most used toys a good thorough cleaning every few weeks to keep them fresh. After a few days of chewing, the Captain gets down right gross - especially those tenticals. ::shudder::

What's funny is that most baby toys are made to take a beating and be dunked in bleach water. The rest? Surface wash only. Yeah, because that's going to get out the spitpukefoodgrime that gets on them everyday. Chances are you can wash these apparently sensitive toys in the washer on gentle and they come out just fine! Especially if you have a front loader since they won't be fully submerged. Skip the dryer though, especially for crinkle toys as the heat can ruin them.

This morning, all of the toys, burp cloths, and blankies got gathered up, divided into a dunk pile and a wash pile, and cleaned. Anything hard plastic (links, balls, stacking cups, etc.) gets put in a tub of hot water with 1/4 cup bleach for a bit and then rinsed very well. The soft toys get thrown in the washer with a blanket or two to soften the noise they make as they bang against the wash drum, then hung dry.

Ta da! Clean toys! For the moment anyway.

Friday, June 24, 2011

Momma & Charlie Hang Out Marathon

Thus begins the Momma and Charlie Hang Out Marathon (here on referred to as MaCHOM)! For the next week, Jeff will be volunteering at camp, leaving me and the short man to bachelor(ette) it up. Can one really bach it up with a baby? We shall see. Originally, Charlie and I were supposed to come along, but after the disaster that was counselor-in-training weekend, I opted to stay home.

(Quick back story - the temp was in the 90's with close to 100% humidity all weekend and we were in a non air conditioned cabin. Charlie, and in turn I, hardly slept and he was miserable all weekend. The End.)


I'm ready for the week. I've got my to do list ready, the Keurig is on stand by, the fridge is stocked with meals I can make one handed, and the Bumbo seat is in my bathroom (hey, a Momma's got to pee). Hopefully, I'll be able to seriously clean the apartment, start/finish Charlie's baby book, finish a bunch of sewing projects I have half done, give some lovin' to my poor attention starved cat, and of course, spend some QT with my little man.

On tomorrow's list? Well, tomorrow is going to depend on how tonight goes. Charlie has been in bed since 8pm, but at 2am we need to drive Jeff to the bus stop so he can take the MegaBus to DC. Yeah, that's the catch. If I want the car for the week, Jeff needs to take the bus and I need to drop his butt off when it leaves. The MegaBus leaves this area twice a day - 2am and 2pm.

Please pray for my sleep deprived soul that Charlie sleeps through me putting him in his car seat, driving 20 minutes, dropping Jeff off, driving 20 minutes back, and putting him back in his crib. If not, well, at least the Keurig is fired up and ready to go.

Thursday, June 23, 2011

Well, There Goes That Idea

Charlie loves formula. Tonight was night #2 that I gave him a supplement after breastfeeding to top him off before bed. The second he laid eyes on that bottle he was kicking, flailing, and grabbing for it. Not only did he suck it down in about five minutes, but he held the bottle himself the entire time. You'd think there was candy coming out of that bottle, not Similac.

This is me and my boobs trying not to feel inadequate.

The confusing part? If you don't know, formula smells like crap and I can't imagine it tastes much better. Originally, it was my plan to keep on pumping what I could at work and filling in the gaps with the milk in my freezer stash and formula. If he likes formula this much, however, I may be less inclined to obsess over this. Only time will tell. In the meantime, I now have the job of keeping my supply up when he prefers a bottle of smelly stuff. Rock on.

Wednesday, June 22, 2011

What the F%*# Wednesday

Wordless Wednesday is fun, sure, but I'm feeling a bit more punchy than that this particular Wednesday. Enter "What the F%*# Wednesday."

WTF baby teeth? Charlie is currently cutting three of his top teeth at the same time. You read that correctly, three. He has been a miserable mess and aside from the occasional hit of Tylenol there really isn't much we can do. He's started taking a cold ring teether, but only in the last 24 hours or so. For the love of all that is holy, I hope these teeth make an appearance soon.

WTF boobs? Yes, this is a sneak attack boob post. Since starting Charlie on solids, my milk supply has been slowly taking a dive. A lower supply means a personal invitation for Aunt Flo to reappear, which means an even lower supply. A vicious cycle. We've got a little over 4 months to go before we can wean him onto cow milk. Even if I have to deplete my freezer stash, even if I need to supplement with formula, this kid will get breast milk until October 31st if it kills me!

WTF weather? I don't exactly want it to be 100 degrees outside, but c'mon with all this flippin' rain and thunder!

WTF bugs? Grounds crew spread new mulch in all of the flower bed around our building and with it, brought those little house centipedes. Tons of them. Apparently, they enjoy the basement because they are everywhere - including our apartment. Joy.


What is your WTF Wednesday?

Tuesday, June 21, 2011

Tutorial Tuesday: Reversible Car Seat Strap Covers

I don't know if I'm creative enough to keep up with one tutorial a week, but I can sure try!

This week, I'm going to show you how to make easy reversible car seat strap covers. They took me about 45 minutes (including the time it took to figure out how to actually make them) so I'd consider it to be a relatively quick project. Obviously, these pink butterfly strap covers weren't made for Charlie's uber masculine Mickey Mouse car seat, but it was the only car seat I had on hand to show them off. Bear with me.

For this project you'll need:

Fabric (small scraps or swatches will do)
8 inches of Velcro
Fiber fill stuffing
And of course pins, scissors, iron, thread, and all the good stuff


First, cut out four 6" x 5" rectangles from your fabric - two of the front pattern and two of the back. Right sides facing, pair up your fabric. I backed this green and pink butterfly pattern with a pink minky. Using a ruler, mark off the center 2 inches on the long side. Do this for both sets of fabric. This will be the channel you sew to hold the stuffing. I have a special quilting marker that disappears with water - its inexpensive and I highly recommend it for any sewing, not just quilting.


Now that you have the center channel marked off, sew around the edges (with right sides facing) from the start of one mark around the sides to the other mark (left picture). The space between the marks should stay open. Next, snip the corners, taking care not to cut into the seam, so when you turn it inside right you will have nice pointy corners (right picture).


Next, turn the rectangles inside out using the opening. Iron flat.

(Yes, it is important to iron while you're sewing. If your sewing machine is on, your iron should be on!)

Remember that 2 inch wide channel you marked on the inside? Using a sewing marker/chalk/pencil draw those lines on the front of the fabric rectangle (left picture). This is going to guide you in sewing the 2 inch wide channel for the stuffing (right picture). You can use coordinating or contrasting thread - be creative.


Using a bit of fiber fill, stuff the channel as firm or soft as you like. Next, using a blind stitch, close up the channel opening. I found it helpful to shove all of the stuffing towards the bottom so the fabric would lie flat while I was sewing it. The blind stitch can be tricky - keep practicing! It really does make finished projects look so much cleaner.


Now you have two rectangle fabric pieces with puffy middles. Time for Velcro! Cut the 8 inch strip of Velcro into two 4 inch sections. Pull the Velcro apart and pin the strips to the unstuffed wings. In the picture below, it shows the stiffer Velcro side pinned to the front of one wing and the fluffy Velcro side pinned to the back of the opposite wing. When the wings are folded the Velcro should attach to its self. Before sewing, make sure you have them oriented properly! Pulling out incorrect stitches sucks. The Velcro should attach regardless of which side you show - hence their spiffy reversible nature.

A simple straight stitch around the edges should do, but go slowly. It may just be my machine, but the faster I try to sew, the more likely it is to get skipped stitches. If you find your machine skipping a lot, a zig zag stitch will also work.


Once the Velcro is on, you're done! This pattern can be altered very easily to make the straps longer or accommodate wider straps by adding to the original 5" x 6" fabric square or widening the fluff channel. I used Charlie's Graco car seat to measure and the straps are 1 1/2 inches wide. I'm assuming that's pretty standard.

Enjoy! May your little ones ride in style and car nap in comfort! If you have any questions, please let me know!

Monday, June 20, 2011

Toddle Along Tuesday!

If you're stopping by from Toddle Along Tuesday, welcome! Feel free to follow along, but please leave a message so I know to follow you back! If you're not here from TaT, head over to Growing Up Geeky or Our Growing Garden and hop on board the Mom/Pregnancy blog train. :-D Have a fabulous Tuesday, everyone!


Father's Day: Part 2

Why a part two? Because I was too lazy to upload pictures yesterday. Here we go!

For Jeff's first Father's Day, I did the Shutterfly photo project thing and made a mug and a notebook with Charlie's pictures on them. Super cute! The top prize according to my husband, however?

The waffle maker.

Originally, Jeff said he wanted to go to IHOP for Father's Day breakfast. I'm sorry, but waiting an hour to be seated with everyone else in town did not sound fun with a teething baby. Yes, after two weeks of Jeff craving waffles, I decided to just go get a waffle maker. I even found one of those snazzy ones that you flip over to cook. He was tres impressed.

I made waffles and he made bacon and eggs. Yummy breakfast!


Charlie contributed by sitting quietly in his high chair working on chunks of banana shoved in a mesh feeder. Word of advice for you - these mesh feeders are really awesome, but a complete pain in the ass to clean out. Banana is ten times harder than normal to get out because of its wonderfully slimy nature. Regardless of the mess it made, Charlie absolutely loved it. After eating his normal oatmeal and fruit, he devoured 2/3 of a banana in that thing.

As we sat down to eat, I realized that it was our first meal together at the table as a family. Yeah, we're those people - we eat in front of the TV for pretty much every meal. Our kitchen table normally serves as a pit stop for mail, stuff to be put away, my purse, etc. It was really nice to have breakfast together. We may need to do that more often. <3

Sunday, June 19, 2011

Happy Father's Day!

I hope all of the wonderful Dads out there have a wonderful and relaxing day!

Saturday, June 18, 2011

Spring Cleaning Saturday: The To Do List

Its just me and the short man today, so I'm not entirely sure how many chores are going to get done. I do, however, have a to do list which is at least a start...

Wash diapers
Sun diapers (we've got some staining from antibiotic poop - fun!)
Laundry
Wipe down kitchen and do dishes
Make baby food (baked peaches and banana mango)
Clean up toys in living room
Back up pictures onto external hard drive (yes, cyber housekeeping counts too)
Unpack from last weekend
Go to JoAnn Fabrics and use my bazillion 50% off coupons
Work on blanket orders

Let's see what I can tackle while entertaining a 7 1/2 month old. So far so good. ;-)

What does your Saturday to do list look like?

Friday, June 17, 2011

What is the Best Gift You've Ever Given?

How about life? No, not giving birth. Helping to save a life. Its something that few people aspire to - you're just one person after all, what can you really do? A lot, actually.

Recently, I began noticing this badge in people's forum signatures and on other blogs. This particular forum world is an incredibly supportive place and I knew that it could only mean one of our precious little ones needed help. While hopping along various blogs, I found it's source - a fellow forum member and blogging Mommy; Mommy to Kate, a beautiful 10 month old girl who was just diagnosed with Congenital Amegakaryocytic Thrombocytopenia.

What is that exactly? Big words describing a condition where Kate's bone marrow does not function properly, putting her in serious danger. Big words for absolutely heartbreaking. This form of bone marrow failure is incredibly rare and Kate needs a bone marrow transplant as soon as possible.

Prayer for Kate and her family is always welcomed, but there is something more you can do. Consider becoming a bone marrow donor. Be the Match, the National Marrow Donor Program, works to match donors with children and adults in need of a lifesaving transplant. It literally takes 10 minutes to sign up, they send you a registration kit, you swab your mouth with a q-tip, and send it back. You're registered. You can be called at any time to be a bone marrow donor.


Though I do not know Kate and her family personally, I felt a calling to write about this and help out. I joined the registry last night and am waiting on my swab kit to come in the mail. Aside from babies being an obvious soft spot of mine, it just felt like the right thing to do. Really, why not?

Becoming a marrow donor is a very personal decision and can potentially mean a serious commitment in the future. Get the facts and please consider joining. You could save a life - maybe even Kate's.

Follow Kate's journey at We're Finally Three. You can grab a blog button there to show your support and spread the word.

Thursday, June 16, 2011

Buy This, Not That!

I successfully resisted the urge to be "that Mom" yesterday while I was out shopping. You know - that Mom that approaches random pregnant women working on their registry in Target. The pregnant women who can't be more than a few months along, yet are registering for this season's newborn sized clothes, baby shoes, thirty boxes of newborn diapers, and other hysterically ridiculous things.

I know, I know - I was that excitedly naive back then, but at least I took it upon myself to *try* and make my registry useful.

The situation inspired me to share some of our favorite things in hopes of helping others through the big scary world full of baby junk. So, blog world, here is a list of our current favorite baby things that we seriously recommend!

Charlie's Favorite Toys:

Captain Calamari
Seriously, this might be his favorite toy at the moment. With eight exciting legs to choose from, a crinkly hat, and a mirrored under belly, the Captain provides way more entertainment than I first gave him credit for. Charlie's favorite in particular is the hook hand, which is more of then than not soaked with drool. Second favorite is the clinky rings with the silky crinkle tentacle as a close third. Though he won't correctly identify his cephalopods since this is clearly an octopus and not a squid, I am so glad we received this as a gift (from Grandpa!)


Stacking Cups
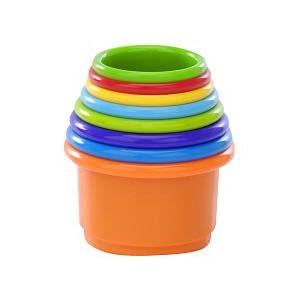
Another gift (from Aunt Christina) that we didn't even know we needed, these simple stacking cups are another absolute favorite. He holds them, chews on them, throws them, and knocks them down. Eventually, he can add stacking them to his repertoire. They make great bath/pool toys as well since they have holes in the bottom and water streams out in different patterns.


My Pal Scout
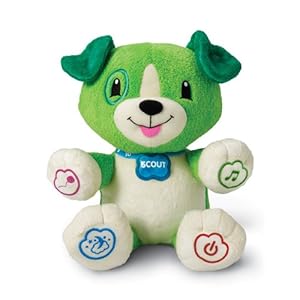
While creepy at first, this programmable pup is quickly becoming a staple in our house. With the help of a USB cord and Leap Frog's easy to use website, you can teach Scout your child's name, how to pronounce it properly, their favorite animal, food, and color, and choose songs, games, and lullabies from a bank of available tunes. There are even seasonal songs that come and go throughout the year. The bonus? When you're sick of hearing "Wheels on the Bus" every. five. minutes. you can go back online and swap it out for a different song. Genius.


Mommy's Favorite Baby Gear:
There are a lot of random baby things that I love, but these are a few of my current raves.

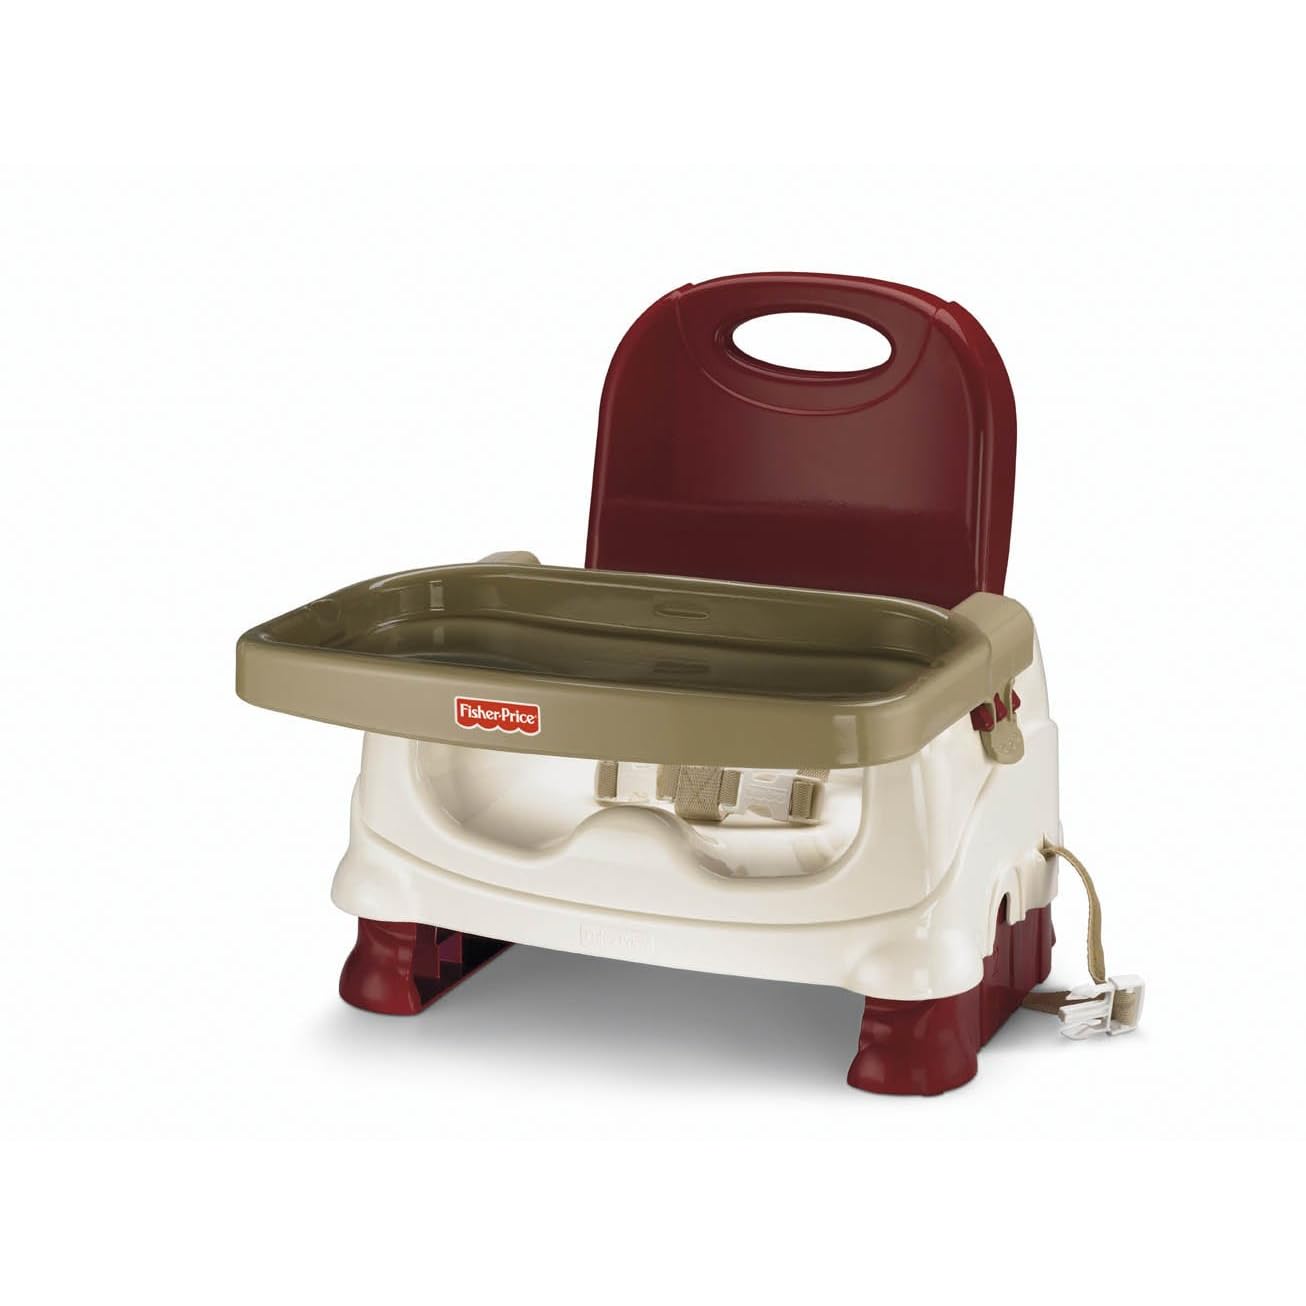
Fisher Price Healthy Care Deluxe Booster Seat
Not only does this high chair fit onto any kitchen chair, but it folds up to be taken anywhere. It folds down and sets up fast enough to make taking it to restaurants and on trips totally worth it. The tray is dishwasher safe and comes with a cover to keep it clean when you're on the go.

Charlie's Soap
Yes, that's really the brand name. We forgot to bring our BumGenius detergent while visiting family this past weekend and needed to find a substitute in a pinch. Surprisingly, Fresh Market had Charlie's Soap for a great price and I couldn't pass it up. Thus far, I really like it and prefer it to the BG powder. Not only is it cheaper ($14 for 80 loads as opposed to $13 for 66 loads), but it removes pee stink and poop stains like a champ. Even after just a few washes I can tell a difference. It is completely hypoallergenic, plant based, and all that crunchy granola stuff. Even the plastic tub it comes in is made of 100% recycled materials. Its available on their website and at a few retailers.

Baby Trend Velocity Jogging Stroller
I'm no jogger, but I still absolutely love this stroller. It folds up relatively small for its size, has a roomy basket underneath, two big cup holders, and an mp3 player dock with speakers. Yes, my stroller has speakers. They're not Bose or anything, but its a neat feature. Its a ridiculously smooth ride, even over grass and gravel. The padded shoulder straps made it so Charlie was able to sit in it safely starting at around 5 months, which for him was only about 10lbs. The tray swings out of the way and the back lays completely flat, making diaper changes easy on the go. We purchased ours at Babies R Us with a 20% off coupon, making it a great deal.

Tommee Tippee Lil' Sippee Cups
If you use Tommee Tippee bottles, you're going to want to invest in their line of Lil' Sippee cups as well. Each piece is completely interchangeable - you can put handles on a bottle, a bottle nipple on a sippy cup, etc. It makes sippy cup training so much easier. Charlie wasn't ready to go from the low flow bottle nipple right to the super fast flow of a sippy cup top - especially with something foreign like water or juice. We did, however, want him to start learning how to hold it for himself and tilt it back to drink. We were able to put a regular bottle nipple on his cup instead. When we were trying to keep him hydrated in the hot weather, it was helpful to use a regular 9 oz. bottle instead of the cup so I know how much he's drinking. They can be more expensive than regular cups, but every once in a while Babies R Us has a buy one get one 50% sale that helps big time.

In conclusion, this stuff rocks and I'd recommend it to anyone with a little one. There is a lot of baby stuff out there and most of it is expensive as hell. Don't be shy to ask around for what is best, but after you do, make the decision for yourself. One parent's rave is in another parent's yard sale pile. ;-)

Wednesday, June 15, 2011

Um, Photography is Hard

I have an entirely new appreciation for those who take beautiful pictures - it is a lot harder than it looks. I've always had a point and shoot camera, but after seeing gorgeous pictures on friend's blogs and facebook profiles, I decided I wanted to try my hand at photography with a digital SLR. Luckily, my brother was nice enough to lend me his Canon Rebel xTi to get a feel for it before I dropped several hundred dollars into my own.

It took me 30 minutes to figure out how to change the f stop and another two days to figure out what the f stop actually does. ::facepalm::

I promise I'm not a totally helpless case. After playing around with the settings and trying different things, I think I'm getting the hang of it. I've found a few tutorials, manuals, and online courses that seem to be helping as well. I have no delusions of becoming an award winning photographer - I just want to take nice pictures of my kid that aren't blurry as hell.

I took the camera with us to camp this weekend and was able to test it out a little in the natural light.

Pictures from around camp...


 Yay for playing with field of focus...


 And this is what happens when you figure out the white balance...


 Other random pictures...


It was a lot of fun trying to figure things out. I still need A LOT of work - especially on lighting and figuring out the manual settings. It'll come with time. In the meantime....don't make fun of my crappy pictures. :-P

Thursday, June 9, 2011

My Poor Little Man (and his Poor Little Man)

Yesterday morning, Charlie had an outpatient surgical procedure to repair a congenital birth defect called hypospadias. Its a fairly common issue, affecting about 1 out of 200 baby boys - which should give you a hint as to what the problem is. Be careful when googling hypospadias; you're going to get a lot of penis pictures. You've been warned.

A few days before Charlie was discharged from the NICU, we had him scheduled for a circumcision. When the time came, a doctor and nurse wheeled a portable surgical cart into his curtained area and started setting up. I had originally planned to be there for the procedure to hold his hand, but when I saw the baby shaped back board laced with restraints I about lost it and had to leave. I sat outside, like a coward, waiting to hear his tiny little cry, but it never came. The doctor came out, taking off his gloves, and explained that he could not be circumcised because of his condition. Without getting too graphic, during a hypospadias repair the excess foreskin is used to patch things up. Therefore, it couldn't be removed before the repair.

The next step was to find a good urologist in this little mountain town. We were fortunate to find a urologist who came highly recommended and had performed this surgery on numerous other children. After our first consult, he said that Charlie's case was on the milder side and would be easily fixed with one surgery. Good news all around.

On Wednesday, we arrived at the surgery center at 7:30am to get all of the paper work filled out and Charlie prepped for his 8:30am surgery. Poor kid wasn't allowed to eat after midnight, so he was still running on the nursing session he had around 11pm. He made it until about 8am before going into full on melt down mode. We changed him into a tiny peach colored hospital gown, spoke with the doctor and anesthesiologist, and handed him off to one of the nurses. They took him back with a blanket given to him by Project Linus blanketeers. Its amazing - another charity that I have been particularly passionate about found its way into my life.

We headed out to the waiting room to sit out the next few hours.

Around 11:30am, the doctor came out to talk to us. We were surprised - it was supposed to take much longer. He said that once they began everything, he realized things weren't as bad as he'd originally thought and he was able to fix everything up in about half the time. Wonderful news! I was so nervous about Charlie being under general anesthesia, so this was music to my ears.

After about 15 minutes, we were allowed to go back to Charlie's room to see him. Poor little guy had adhesive marks from tape and monitors on his face and chest and a wicked glazed over look. Luckily, he was awake enough to nurse which helped him relax a little. The nurses were able to check his vitals while he and I cuddled and after about an hour, his IV was removed and we were allowed to go home.

As part of his recovery, we have to put two diapers on him (the inner one has a hole in the front to give him room and prevent squishing) and no submersion baths for a week and no straddle toys (bouncer seat, exersaucer, door jumper, etc.) for a month. This kid has better learn how to sit up right quick because playing with toys while laying down is going to get old fast!

The past 24 hours have gone much better than expected. Though Charlie has been sleepier, cuddlier, and crankier than usual, he doesn't seem to be in a lot of pain and has been resting relatively comfortably. We're hoping he continues to do well and bounces back quickly.

Tuesday, June 7, 2011

Mommy Blog Hop!

I'm a little late for this week's blog hop, but I still wanted to get involved! If you've pit stopped here on your hop, welcome! Scope things out and feel free to follow me! If you're not part of the Toddle Along Tuesday blog hop, head over to Growing Up Geeky and get started. There are a lot of fabulous Mom blogs on the line up!